How to Draw Using Rainbow Gradient with Dana Komsky

Table of Contents:
Seeing the World in Rainbows
As an artist, it can be a struggle to find your own artistic style; I searched for mine for a long time. When I finally discovered rainbow gradient, it was love at first sight. Rainbows are one the most beautiful phenomenons we can see on earth. Adding the bright and wide range of colors to your page with colored pencils truly makes magnificent results in your art. I love how a rainbow color palette allows you to take an ordinary object and transform it into something extraordinary.
In this post, I will show you a step-by-step demonstration to creating your own rainbow gradient with colored pencils. Rainbow gradient involve a lot of steps and will take more time than other color gradients, but they sure are the most rewarding! After learning this skill, I encourage you to keep practicing by drawing anything and everything in rainbow!
Steps for Starting to Draw with Rainbow Gradient
Step 1: Set aside your color palette
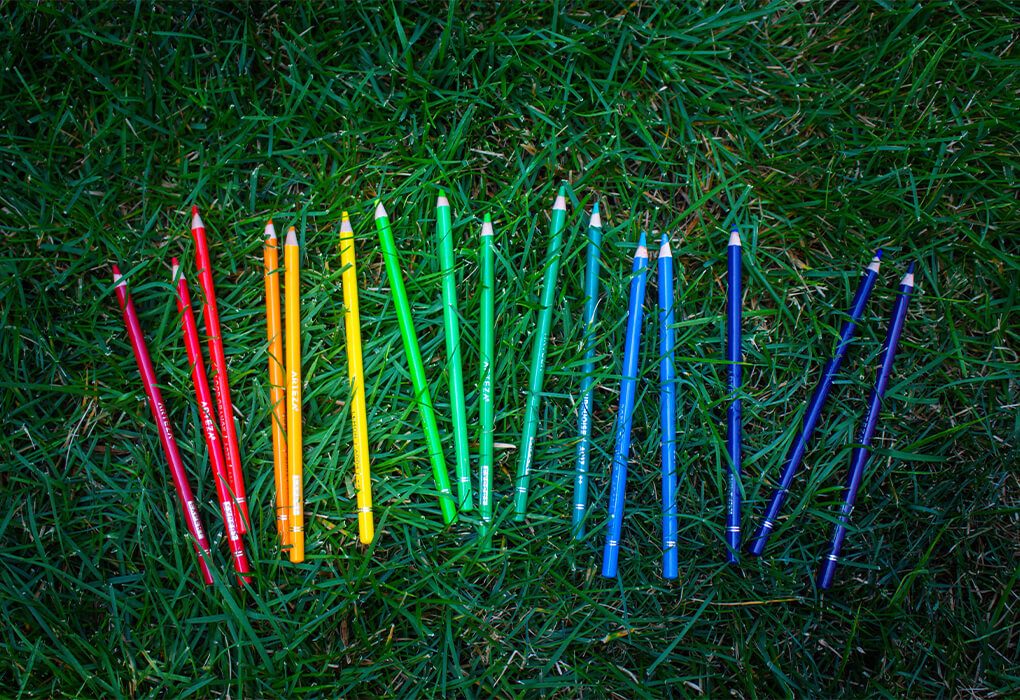
I will be using the set of 72 ArtBeek Expert Colored Pencils. The colors I used are: Carmine Red, Rose Red, Blood Orange, Orange, Burnt Ochre, Yellow Ochre, Tuscan Sun, Camel, Lemon, Lime, Absinthe Green, Spring green, Mint, Turquoise, Robin-egg Blue, Blueberry, Ultramarine, and Amethyst.
Step 2: Create a swatch sheet
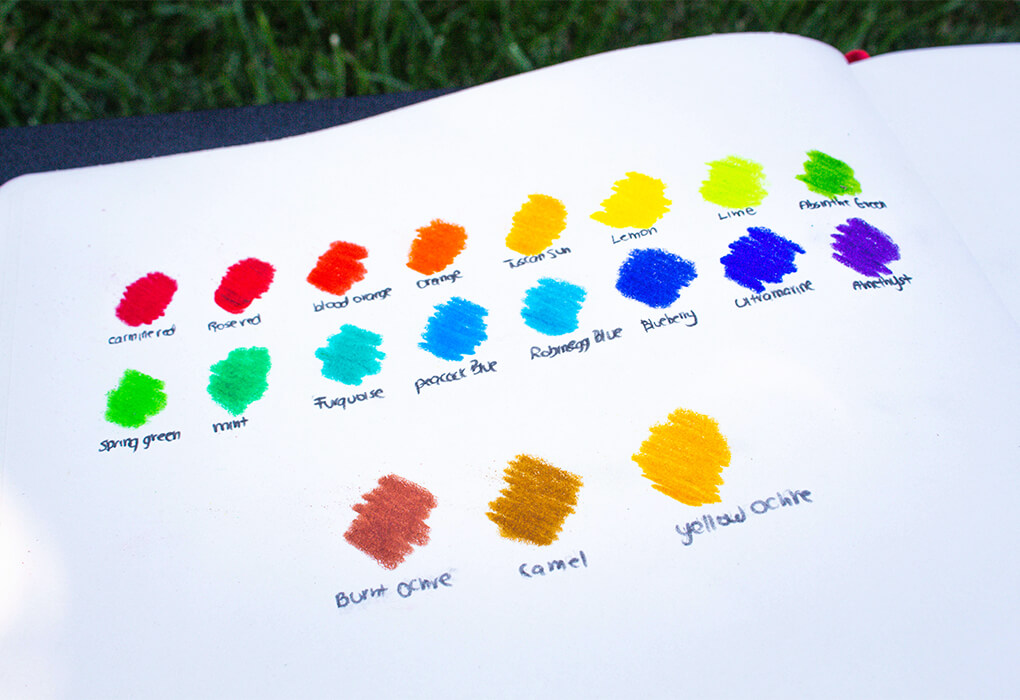
It is important to swatch each color before adding it to your drawing in order to see how it looks and how well it blends into the color next to it. I recommend swatching your colors in the order that you plan to use them, this way there are no surprises when you start coloring your drawing!
Step 3: Start your drawing with a light sketch
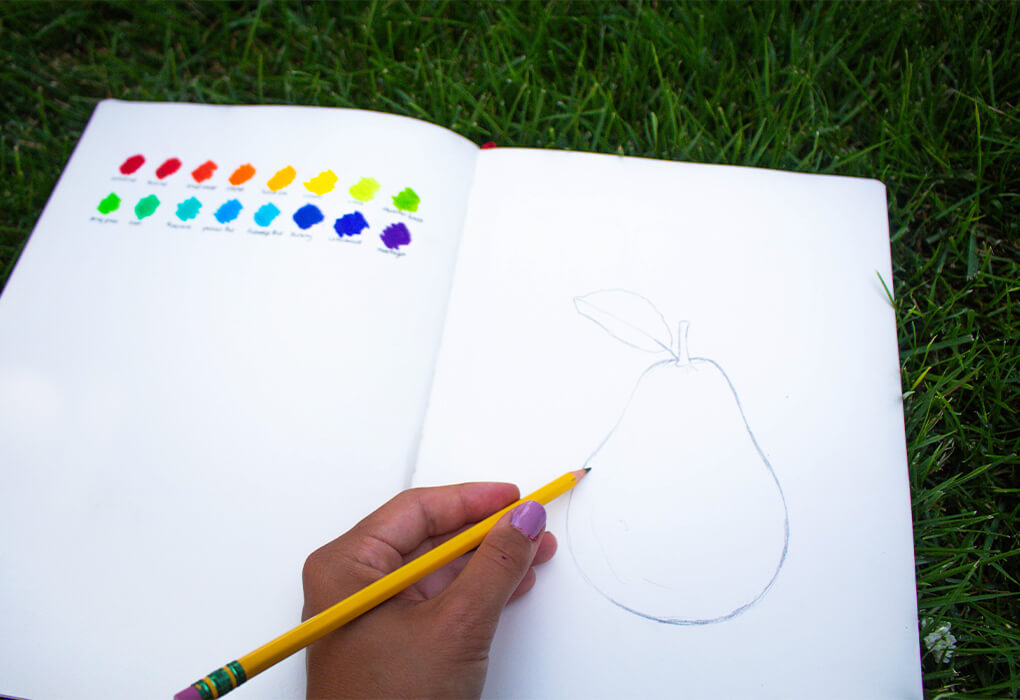
For this, you can use any pencil you like, mechanical pencil or traditional, with an eraser. It is critical in this step that you don't press too hard on the basic sketch or outline. If you do, it will show in your sketch later.
Step 4: Red
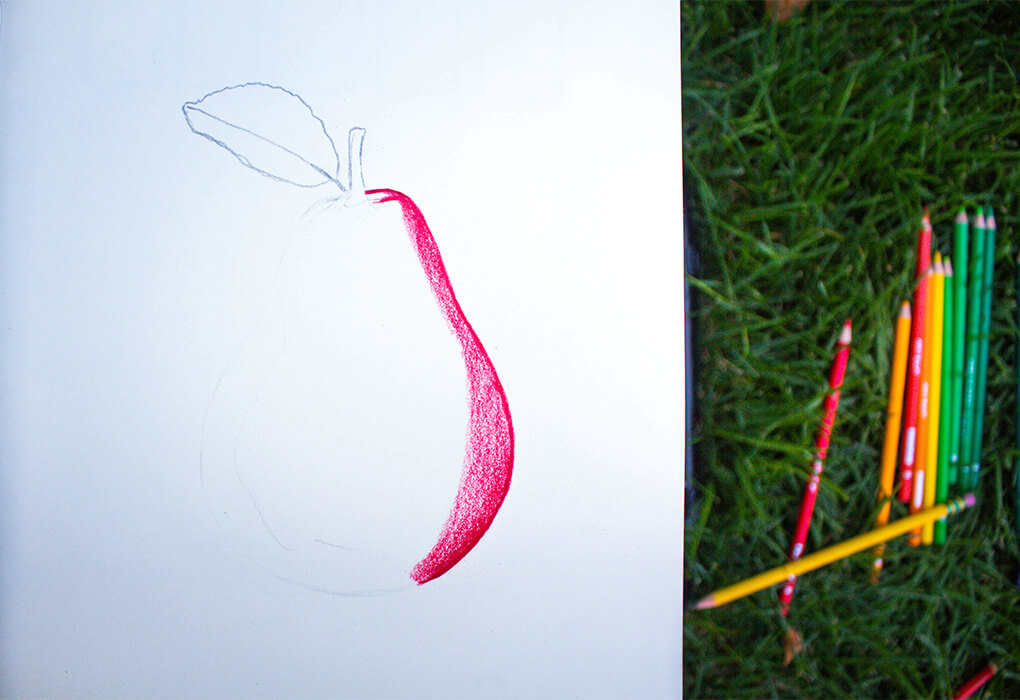
I like to start off with red and transition into the rest of the rainbow from there. When beginning your gradient, lay down the colors by pressing lightly with your pencil. This will allow you to add layers and make the colors blend together smoothly.
TIP: Color with the side of the pencil as opposed to the tip for smoother blending.
Step 5: Orange
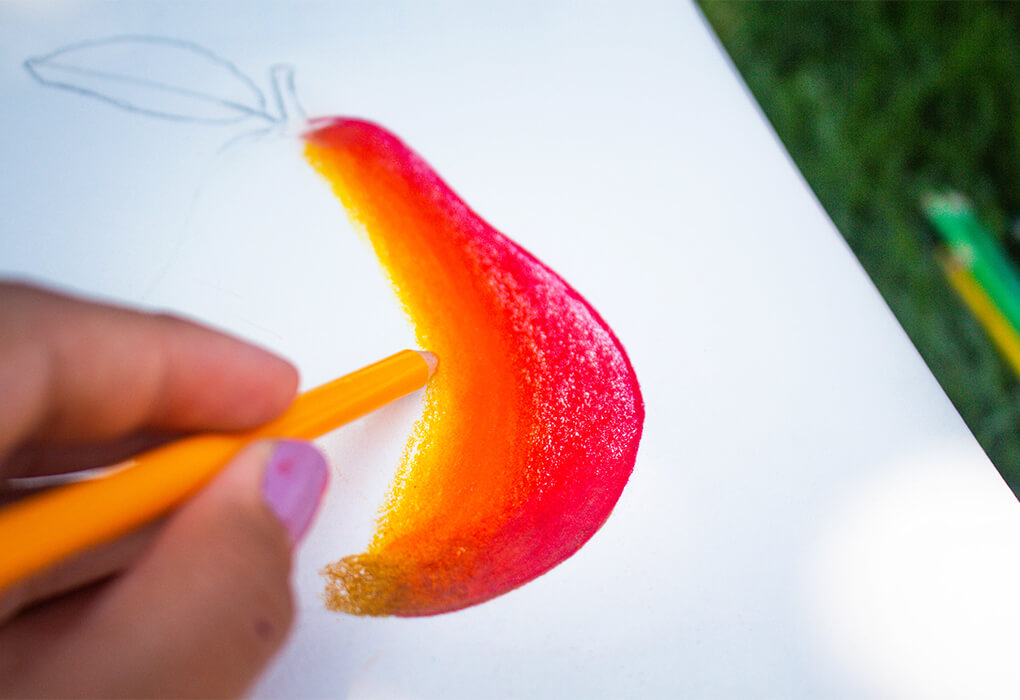
Starting from the end of the red section, use your orange colored pencil to color over it and transition into its own section. Repeat this with Tuscan Sun. At this point, you can keep adding layers back and forth between the two colors to make a solid gradient.
To draw the shadows: take a darker shade of the color you are working with and lightly shade into the original color. Keep layering the bright shade and the shadow color into each other repeatedly until they are blended.
Step 6: Purple
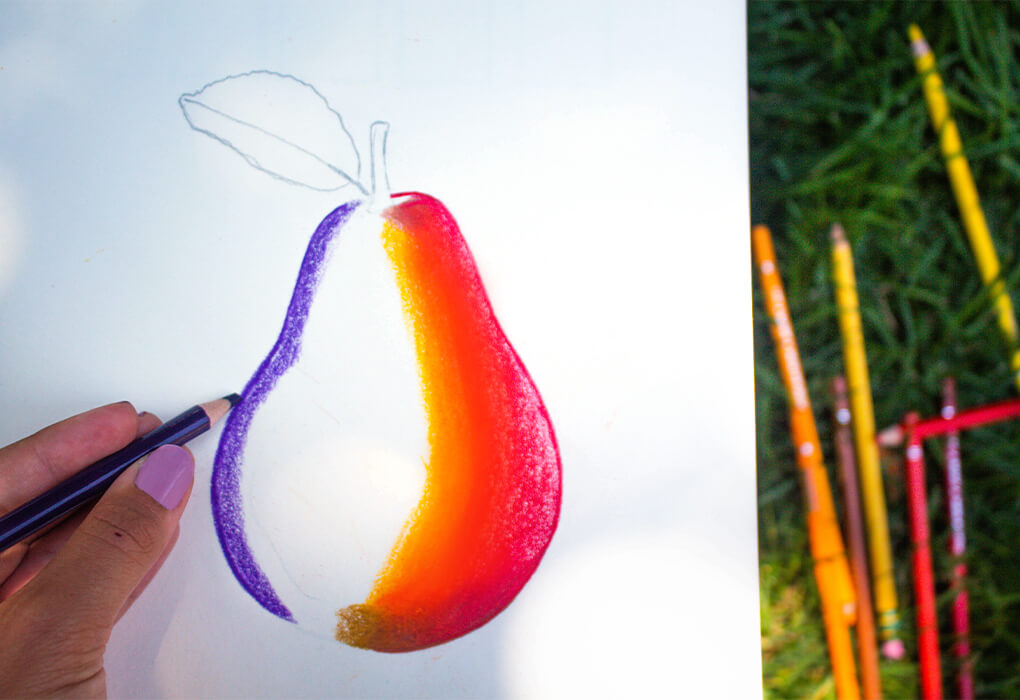
Blending into yellow is pretty tricky, so I like to lay down the colors leading into it from the other side first.
Step 7: Blue and Green
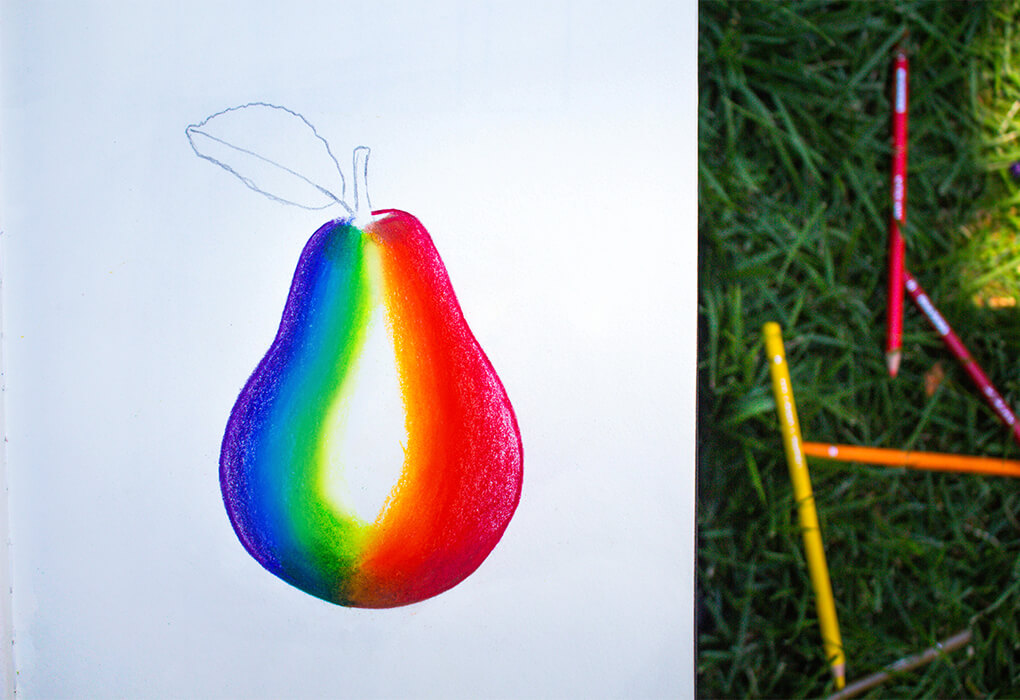
Repeat step 5 with the various shades of blue and green.
Step 8: Yellow
This will take a lot of layering and repetition until everything flows, but hang in there!
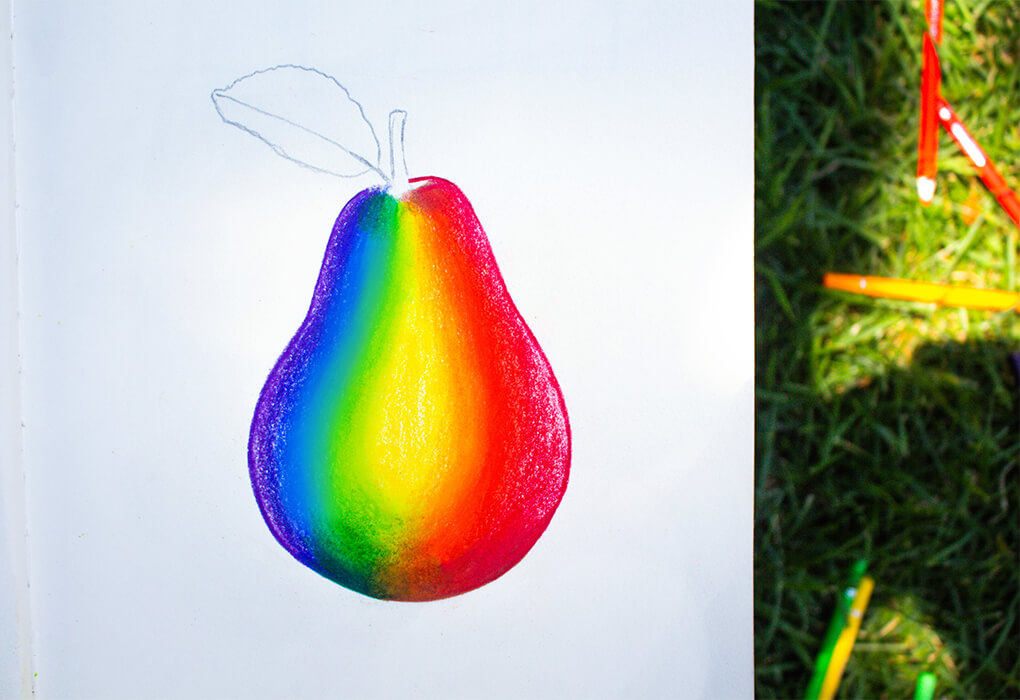
Step 9: Time to blend!
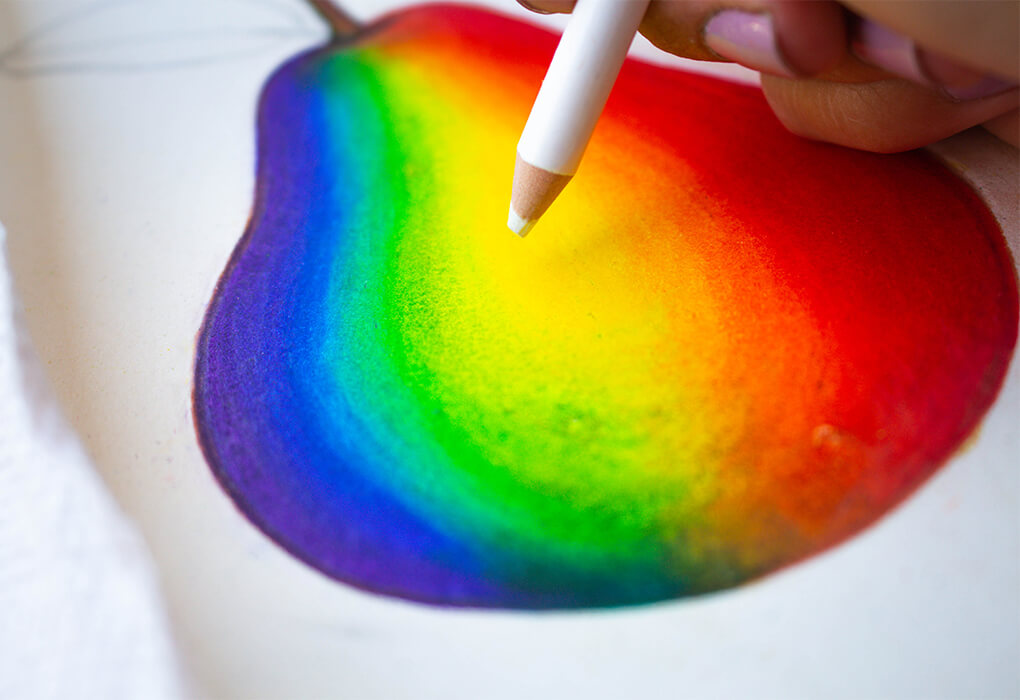
Take each color and go over their respective sections. This time, you’ll want to burnish (pressing hard) with the pencils for a solid and bright gradient. Feel free to add highlights with a white pencil, I added a highlight in the center of the yellow section!
Step 10: Voila. You’re finished!
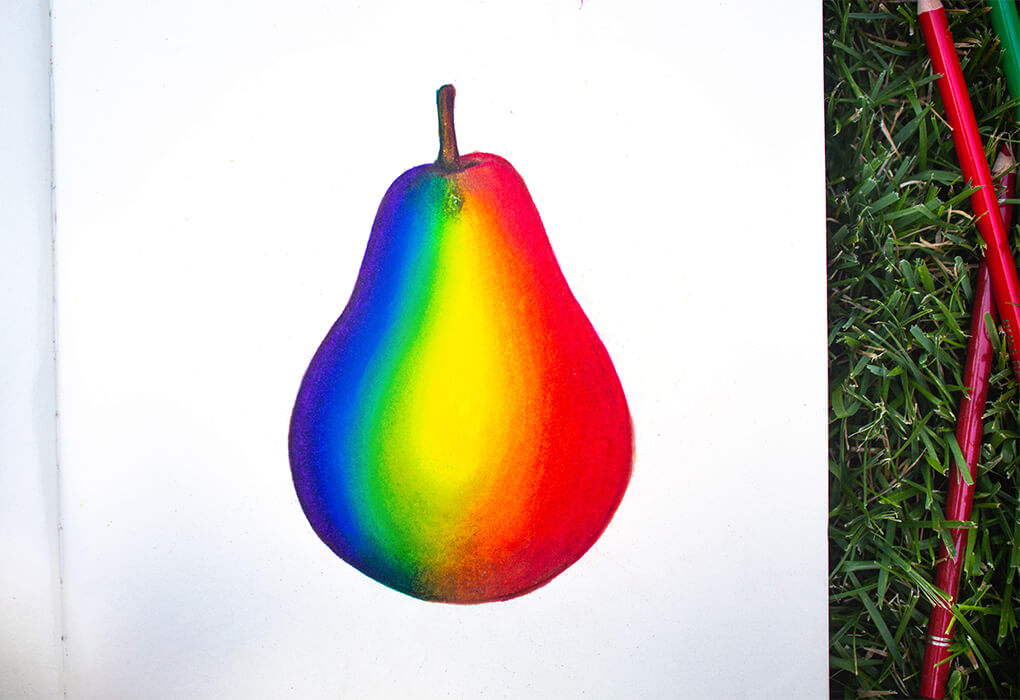
That’s how to create a beautiful rainbow gradient drawing with colored pencils! You can turn almost anything rainbow once you understand the basic gradient — keep practicing and you’ll soon be a rainbow pro. For more rainbow content and drawing references check out my artwork on Instagram!
5 Item(s)